Photography, History and Whatever Else Strikes my Fancy.
Most Vancouverites are aware of the two "bunkers" at Tower Beach and the "Siwash Bunker" in Stanley Park. The Siwash bunker is a WW I relic, originally housing a 4" gun, and as such can be properly referred to as a "bunker." The towers at Tower Beach, however, built for WW II, never were gun emplacements and were never manned, and as such are not really "bunkers" at all. More on that after the cut. |

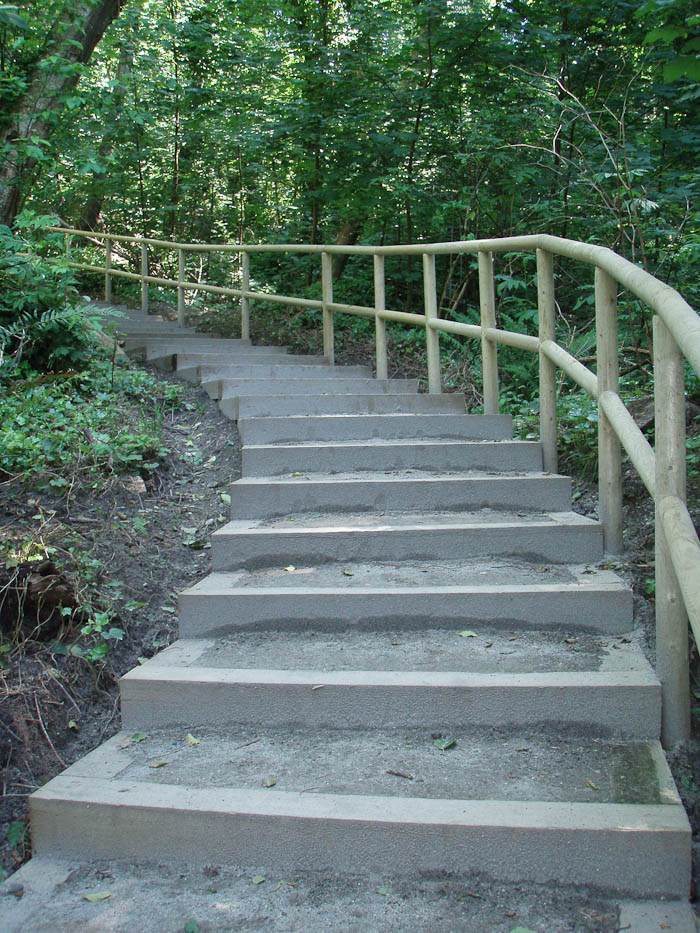
Finding myself out on the UBC campus with some free time on a sunny Saturday afternoon I decided on the spur of the moment to take a walk along Tower Beach, something I've been meaning to do for a while. I wanted to check out the current state of the towers. What you see here is the view down Trail 4, which is just to the west of the Museum of Anthropology. Trail 4 is rather steep, but with a well maintained staircase all the way down. |
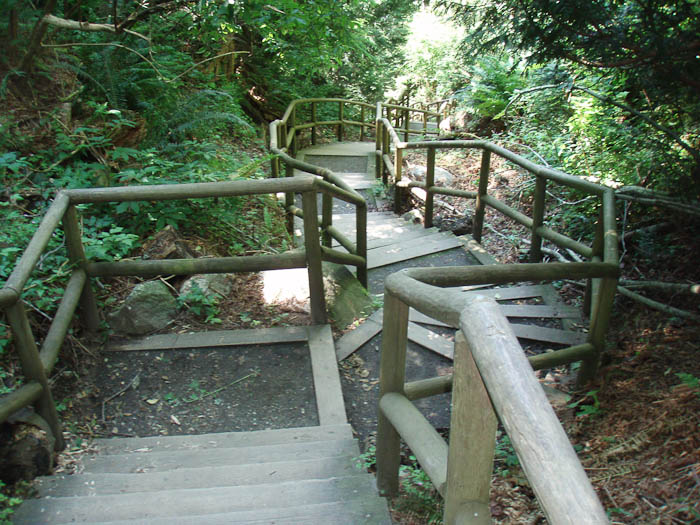
This is about a third of the way down Trail 4, looking down from the bend that is visible in the lower left of the previous picture. The vertical descent from the top of the trail to the beach is about 70 metres. That's a little over 23 storeys, about the same as taking the stairs from the top floor of the Terasen Building. |

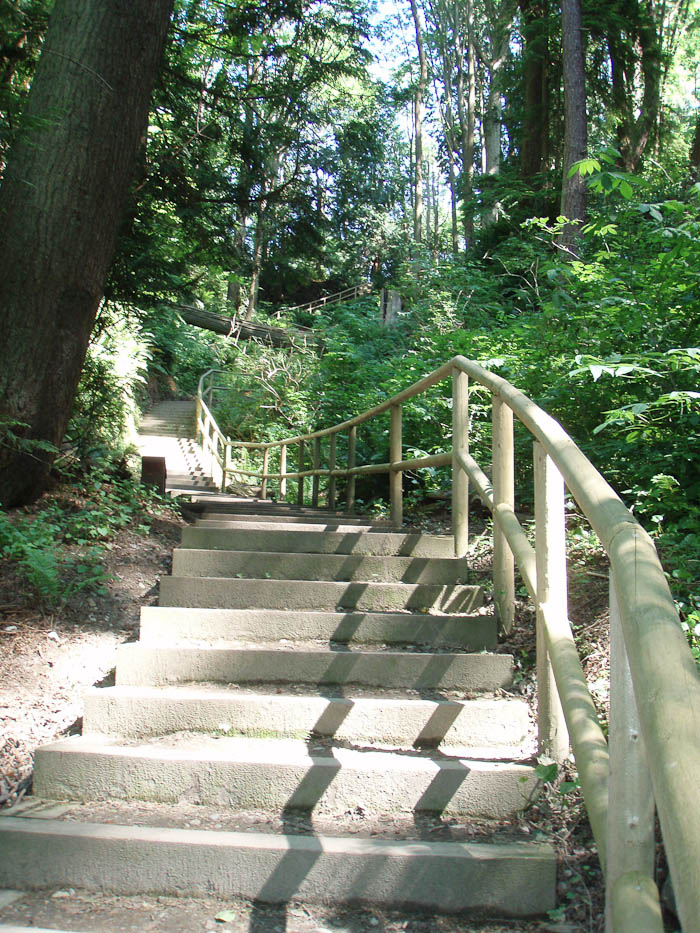
About two-thirds of the way down you get your first glimpse of the beach. Don't be fooled. You are not "almost there." Once you get to the bottom you need to turn right and hike along a rocky beach for about 220 metres. Also, in case you didn't notice the sign at the top of the trail, Tower Beach is clothing-optional (being just around the point from the more famous Wreck Beach.) Tower Beach is less popular than Wreck Beach and you won't be running into the spectacle of human diversity that you'll find on the more popular, sandy beach. Around here the beach is sparsely populated, almost exclusively by overweight, middle-aged men who—if popular wisdom is to be believed—drive very large SUVs. |
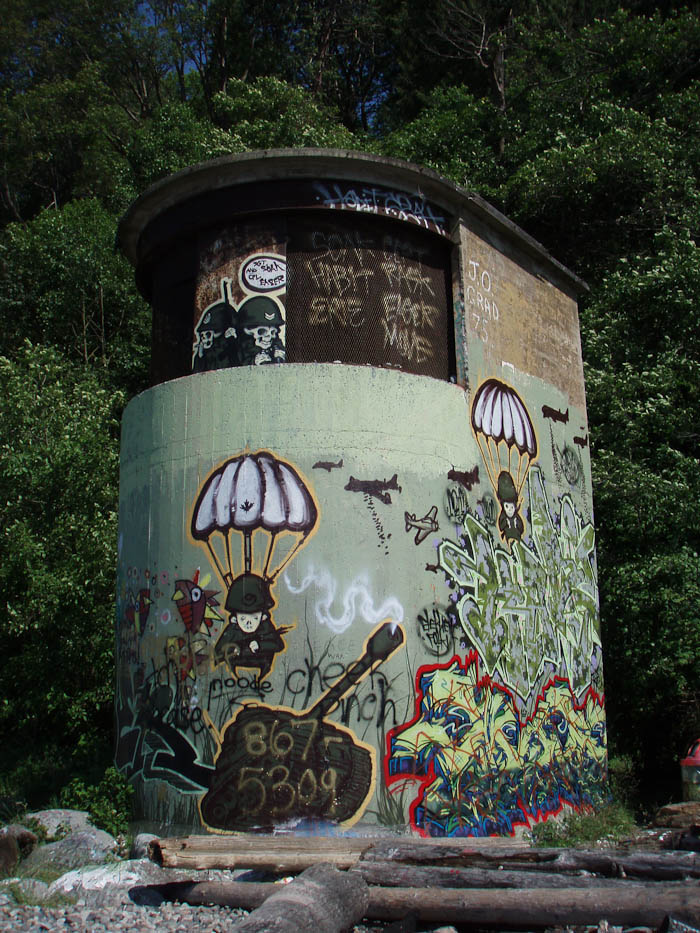
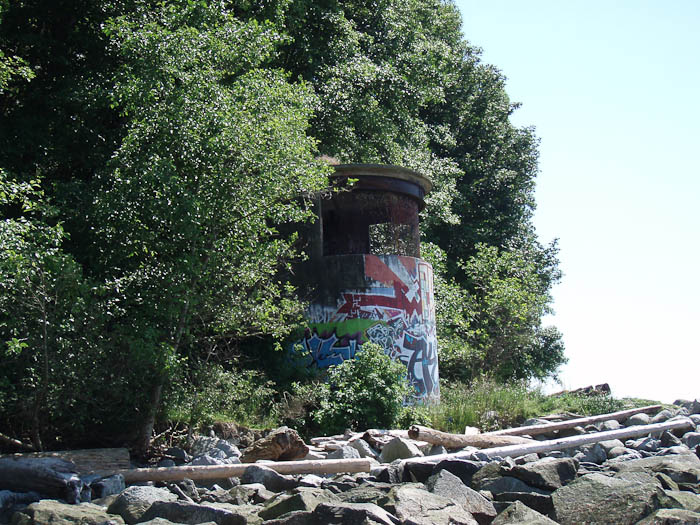
After 70 m of stairs and 220 metres of rock occasionally spotted with albino walrus impersonators that you will never un-see, this is your first reward: what the Wreck Beach regulars call "Tower One" since it is the first tower you run into if you walk along the beach from Wreck Beach to this point. |
"Tower One" is, more properly, is "C.A.S.L. #10." I'll explain what C.A.S.L. stands for further along. |
This is the other side of C.A.S.L. #10, looking back toward the direction of Trail 4. |
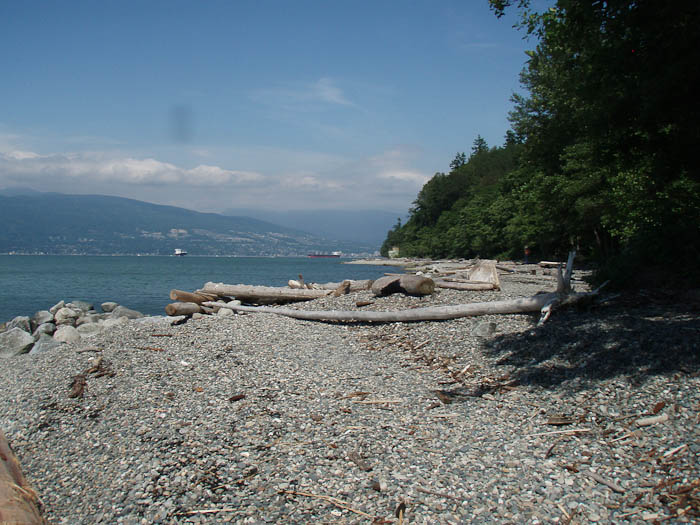
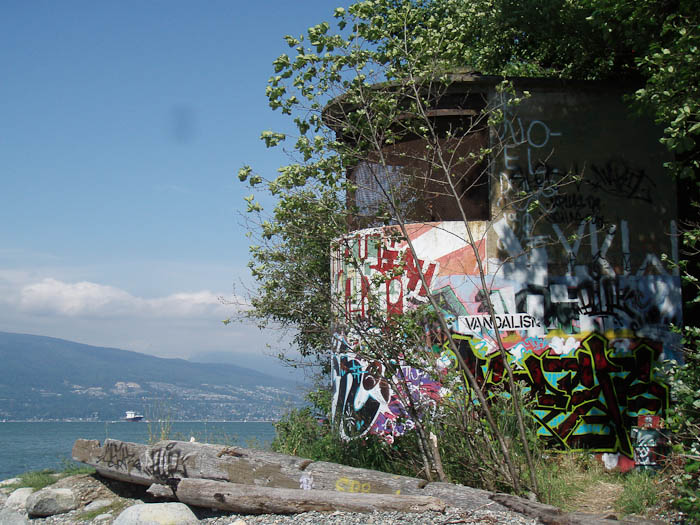
From C.A.S.L. #10 you can see C.A.S.L. #9 ("Tower Two") about half a kilometre down the beach (look just to the right of the freighter that is at the centre of the picture.) About a third of the way along to C.A.S.L. #9 there is a foreshore trail that gets you off the rocks and makes for easier going. As you approach C.A.S.L. #9 the beach becomes slightly more populated since Trail 3 lets out right beside the tower. |
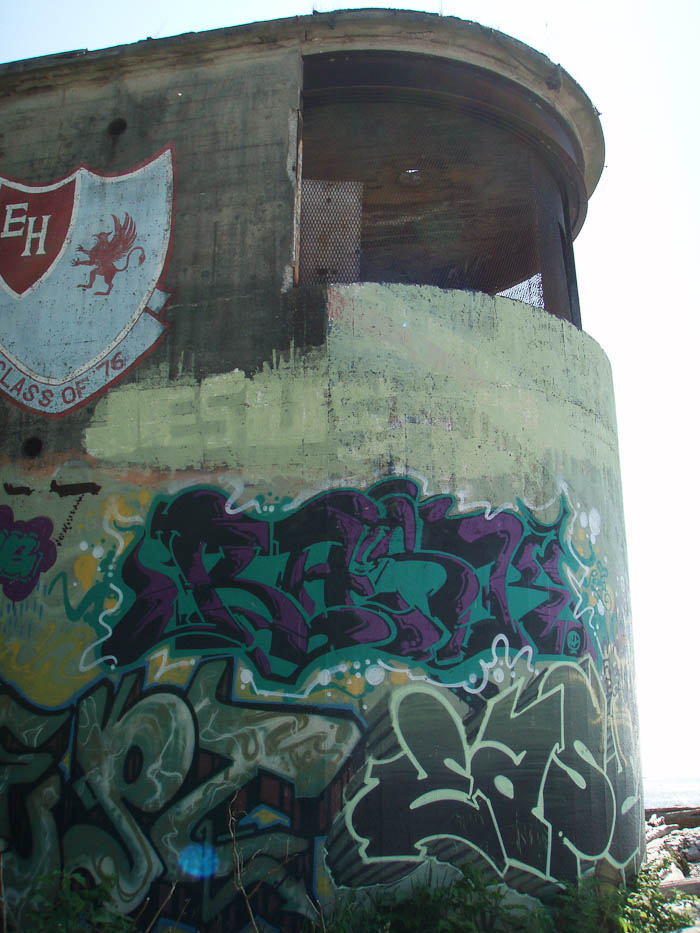
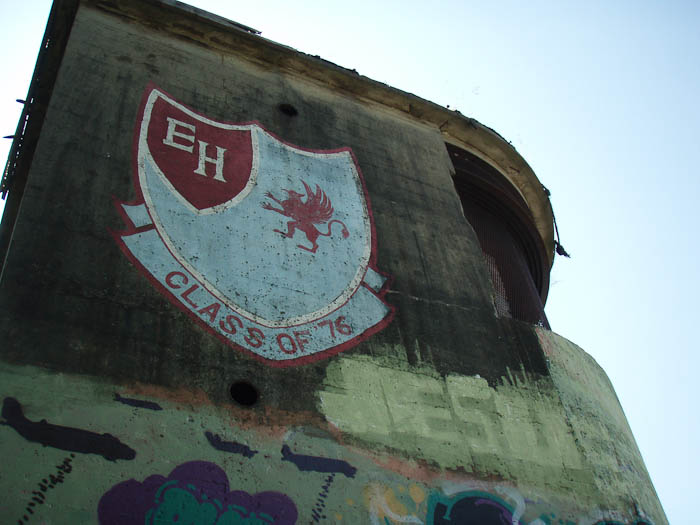
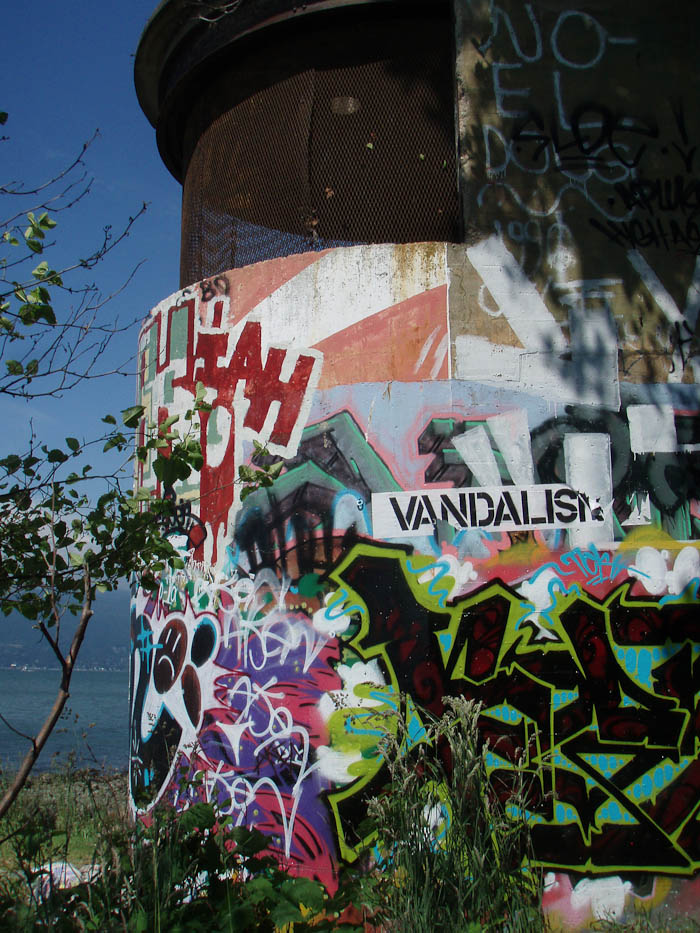
C.A.S.L. #9 is very easy to reach by Trail 3, and as such gets painted more often. Between when they were abandoned in 1948 and the late 1970's the towers were open and it's interesting that on both towers, above what is easily reachable from the ground, graffiti from the 1970's survives. I'll bet there is some interesting stuff inside as well. The large crest here is from the Eric Hamber High School graduating class of 1976. |
At this point is was back up the cliff via Trail 3. Trail 3 follows a ravine and as such is much less steep than Trail 4, but the vertical rise is actually about four metres more than Trail 4, about 25 storeys worth of stairs. If need be, though, there are benches where you can have a nice sit-down in the cool woods as you ascend. |
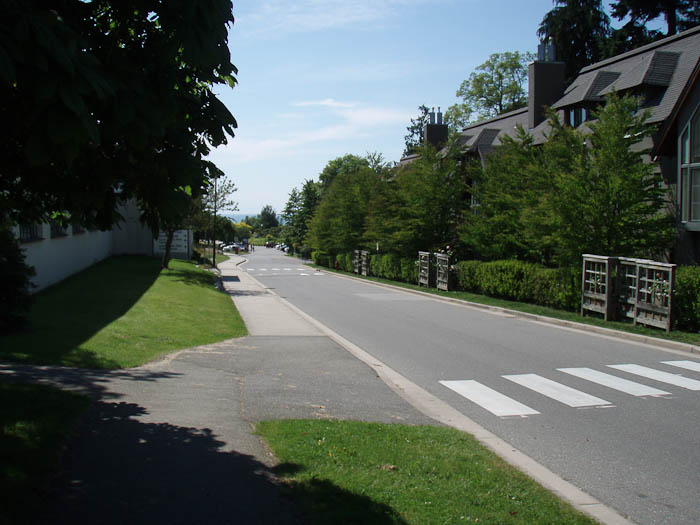
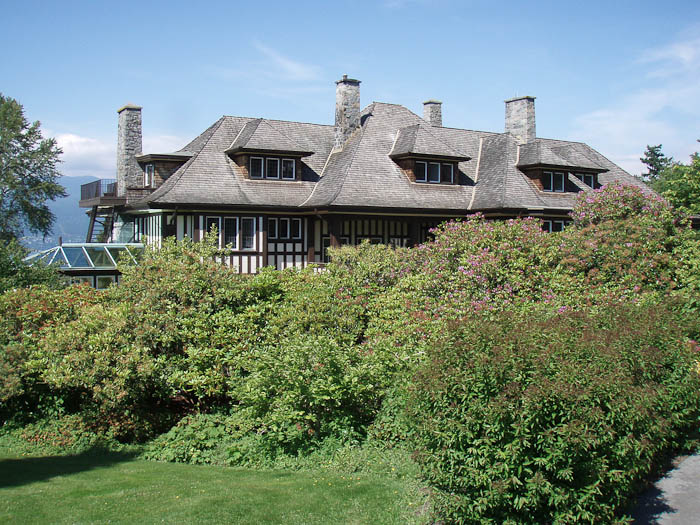
At the top of Trail 3 I turned right along the old access road to the Point Grey Battery, which is called Cecil Green Park Road now, past Cecil Green Park House, built in 1912. Check their website for the history of this house (which I admit to being completely unaware of until I walked past it.) |
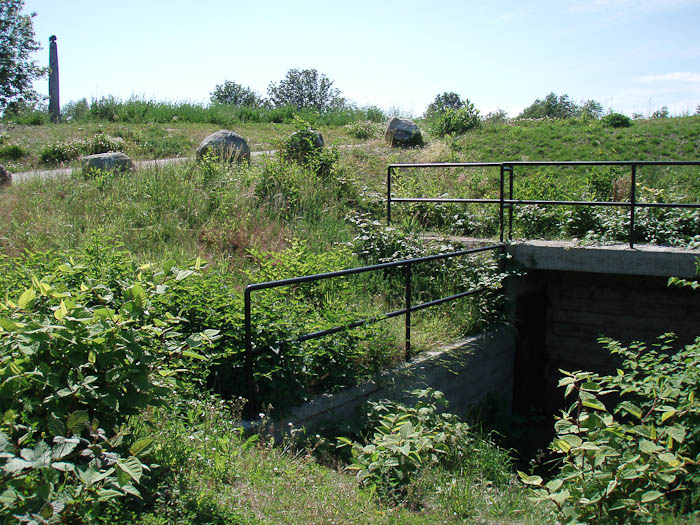
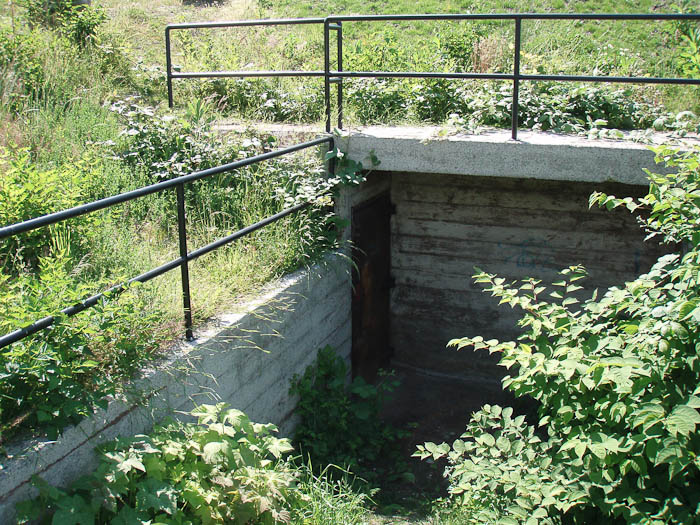
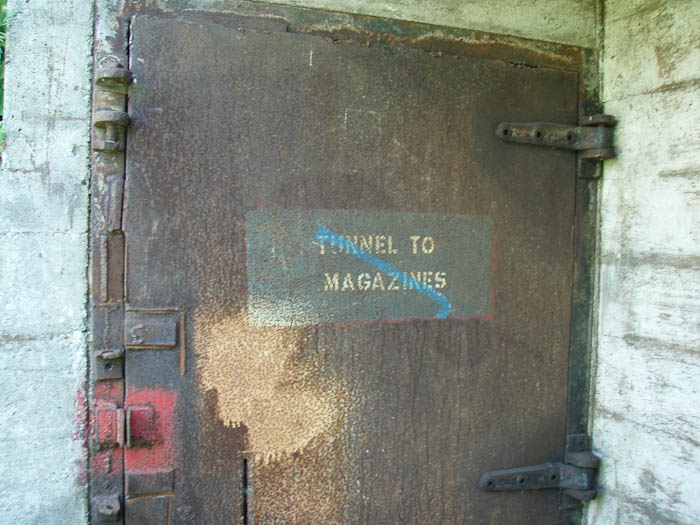
Approaching the back of the Museum of Anthropology I ran into the first remnant of the actual Point Grey Battery, where the guns really were, which is this entrance to the tunnel connecting the magazines of the three gun emplacements. |
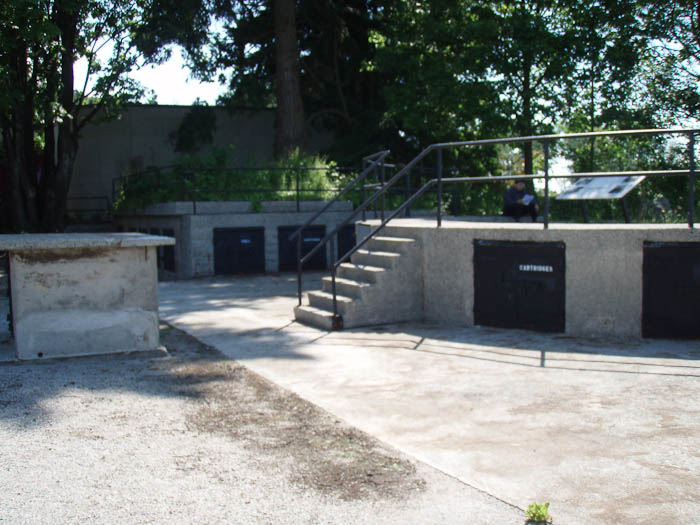
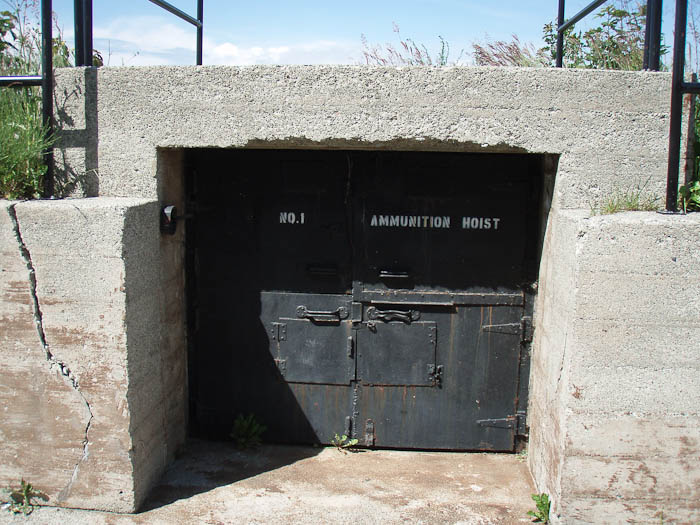
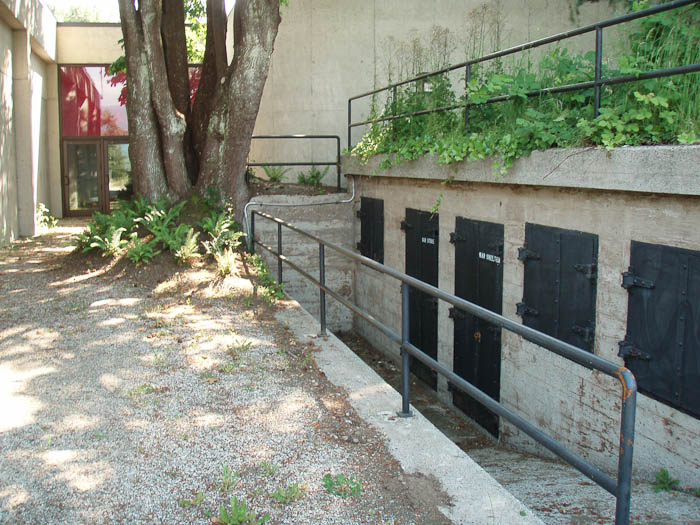
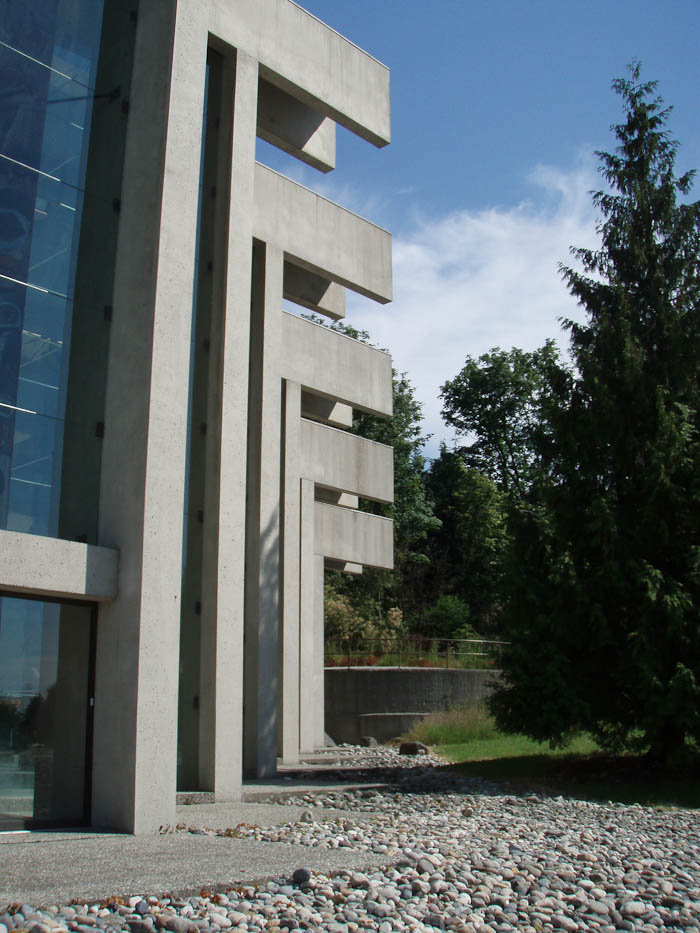
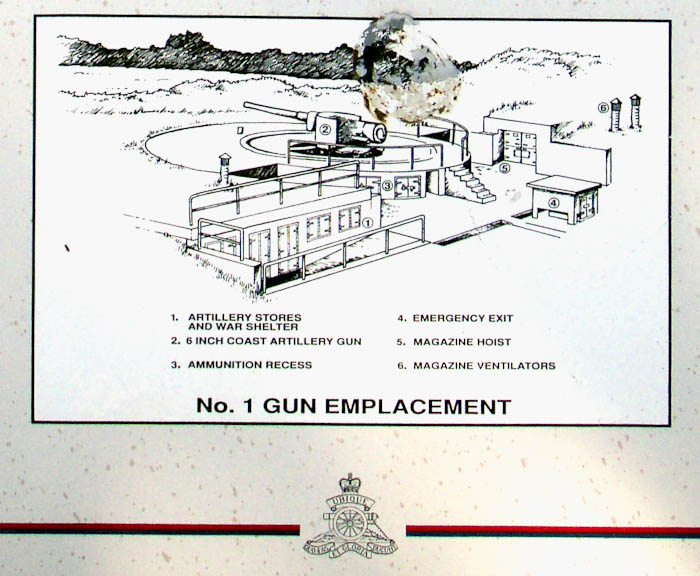
The emplacement for Gun #1 is just outside the back of the Museum of Anthropology and is maintained as a museum piece. It includes a didactic panel that I'll get to at the end of this post. |
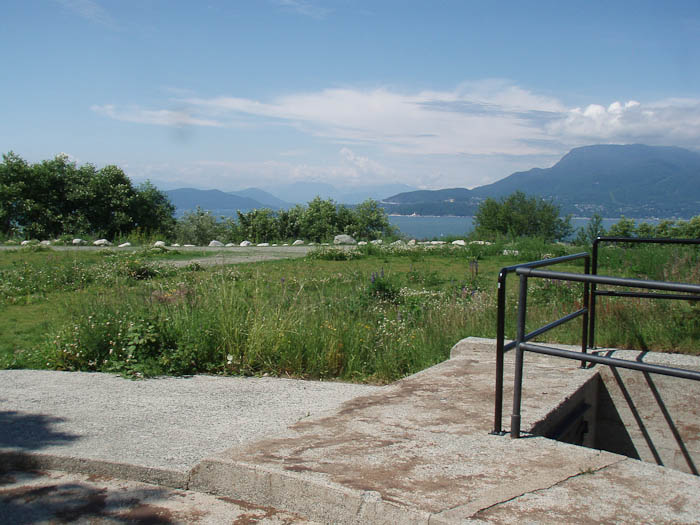
This is the view from the position of Gun #1. The three guns at this battery had a range of almost 13 km (14,000 yards.) More than enough to fire completely across English Bay, enough in fact fire half way across Bowen Island (which is the mountain visible just to the right of the trees at the far left of the picture.) |
The MOA completely straddles the position of Gun #2, but just to the right of the museum you can see the remains of the emplacement for Gun #3. |

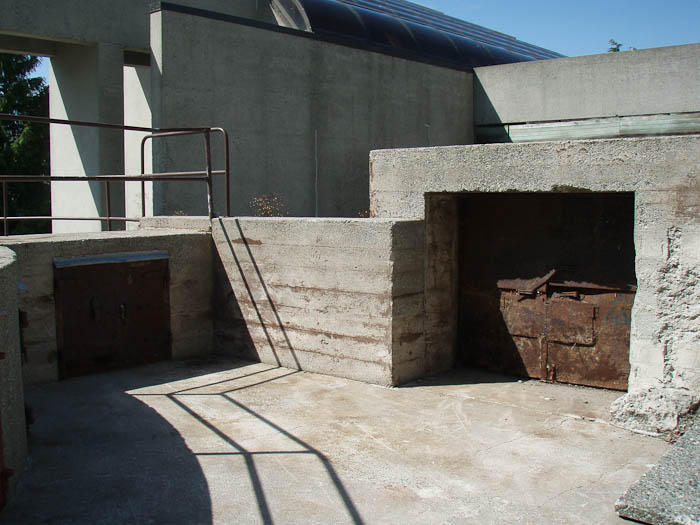
The emplacement for Gun #3 is not marked and is not maintained beyond keeping the access doors from rotting off their hinges. Getting here required going off the path, tromping through some garden, and getting stared at by people inside the museum, presumably wondering why I was more interested in the "foundation" than the museum. |
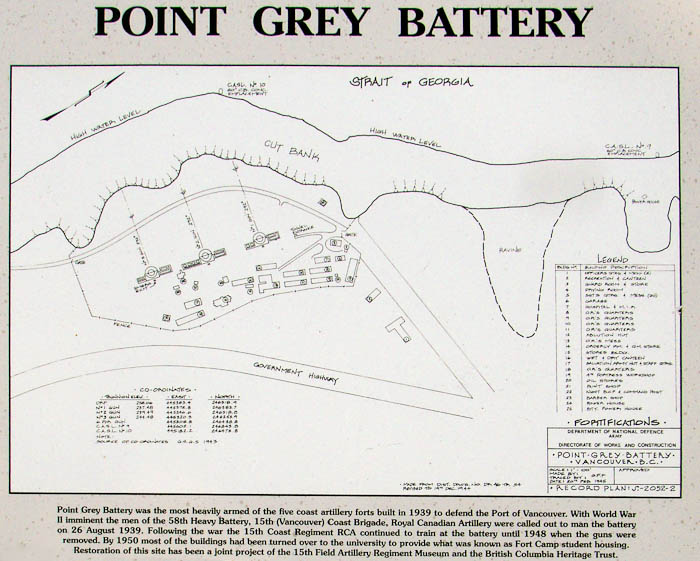
Here is the plan for the Point Grey Battery from the didactic panel at the emplacement for Gun #1 Point Grey Battery was the most heavily armed of the five coast artillery forts built in 1939 to defend the Port of Vancouver . With World War II imminent the men of the 58th Heavy Battery, 15th (Vancouver) Coast Brigade, Royal Canadian Artillery were called out to man the battery on 26 August 1939. Following the war the 15th Coast Regiment RCA continued to train at the battery until 1948 when the guns were removed. By 1950 most of the buildings had been turned over to the university to provide what was known as Fort Camp student housing. Restoration of this site has been a joint project of the 15th Field Artillery Regiment Museum and the British Columbia Heritage Trust.Along the high water mark line at the top of the plan you can see the positions and labels for C.A.S.L #10 and C.A.S.L. #9, a.k.a. "Tower One" and "Tower Two." C.A.S.L. stand for "Coast Artillery Search Light." These towers held not guns, but 60" search lights. The Siwash Bunker in Stanley Park, originally an actual bunker housing a 4" gun was repurposed in WW II to hold a similar search light. Also on the plan you can see "Government Highway" which is now Marine Drive, and the access road for the battery with is now Cecil Green Park Road. |
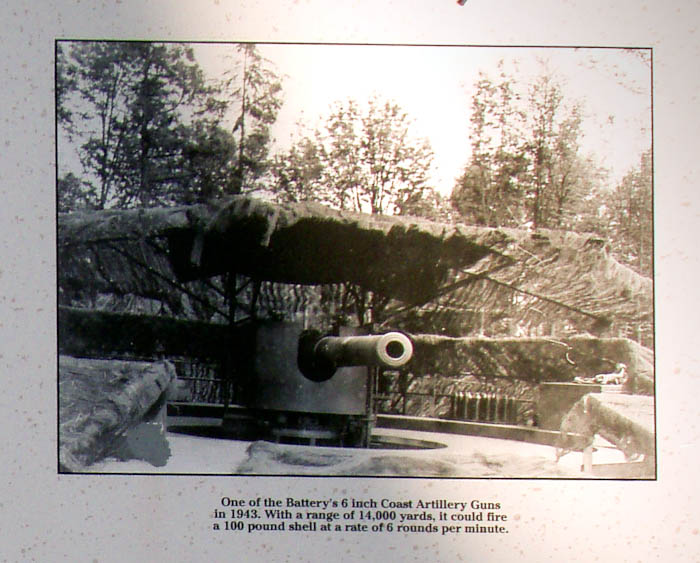
One of the Battery's 6 inch Coast Artillery Guns in 1943. With a range of 14,000 yards [12.8 km], it could fire a 100 pound [45.5 kg] shell at a rate of 6 rounds per minuteAnd just to reiterate, that range is enough to hit the peak of the mountain at the centre of Bowen Island. More than enough to cover the entire entrance to the Port of Vancouver. |
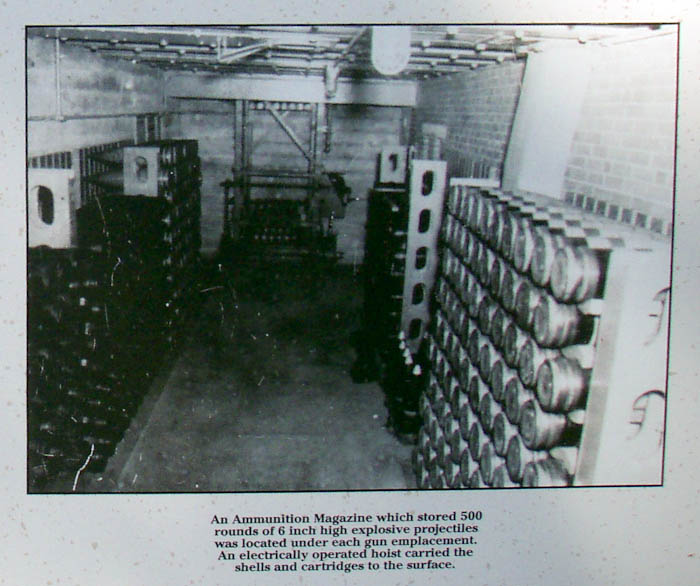
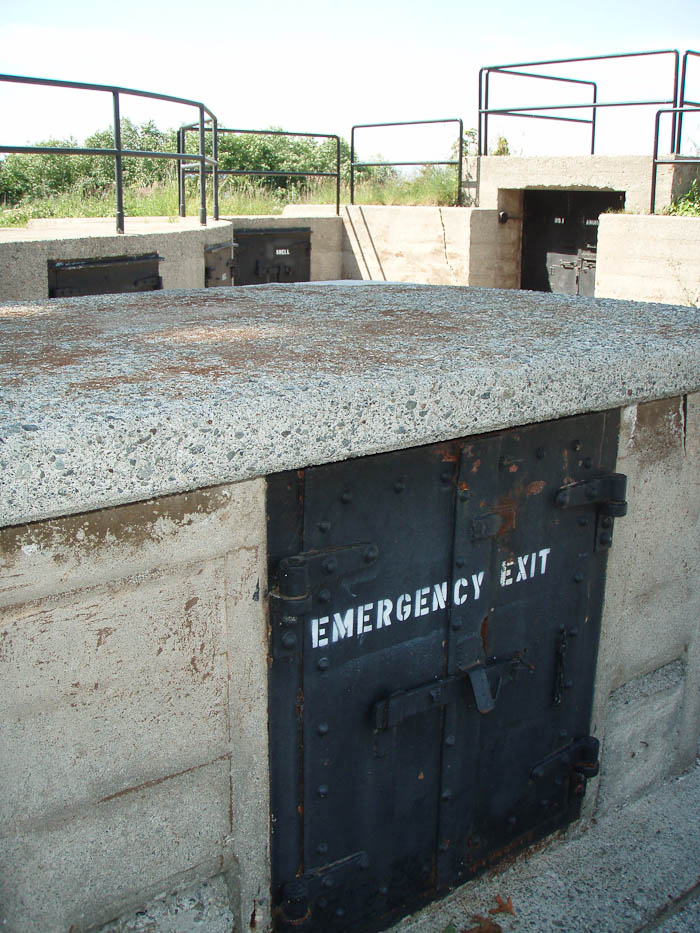
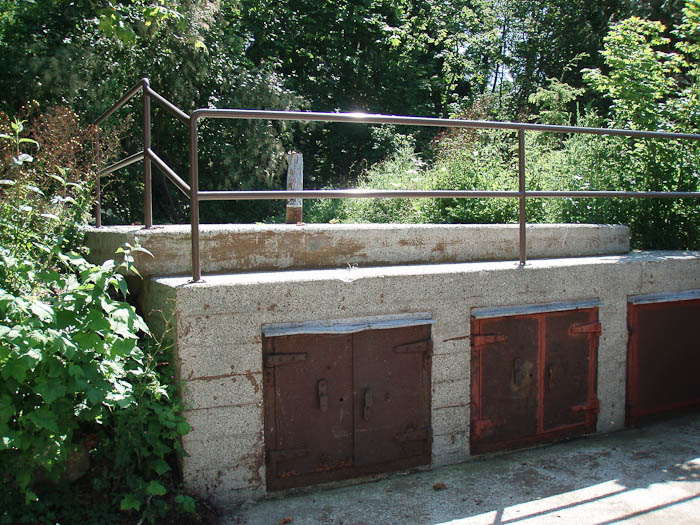
An Ammunition Magazine which stored 500 rounds of 6 inch high explosive projectiles was located under each gun emplacement. An electrically operated hoist carried the shells and cartridges to the surface. |
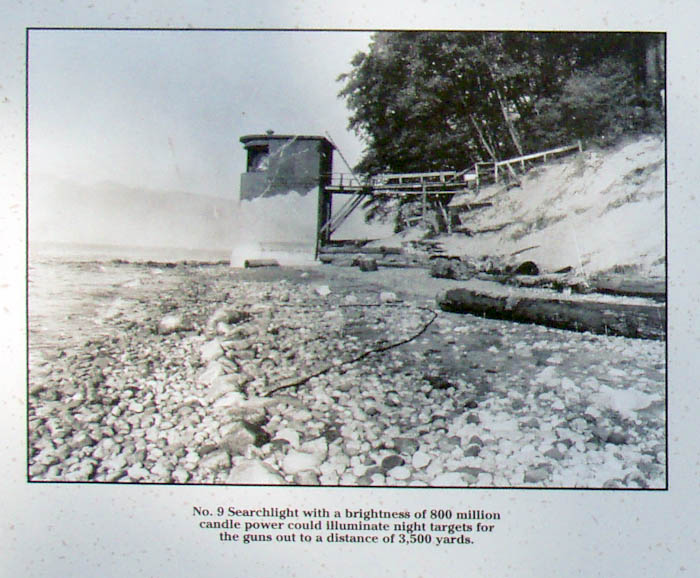
No. 9 Searchlight ["Tower Two"] with a brightness of 800 million candle power could illuminate night targets for the guns out to a distance of 3,500 yards [3.2 km] |

Battery Observation Post. From here the battery commander directed and controlled the fire of the guns. Two 60 inch searchlights [C.A.S.L. #9 and C.A.S.L. #10] on the beach below were remote controlled from the observation post.Note that last bit, remote controlled. No one ever manned the search lights in "Tower One" and "Tower Two." Access to the towers was just for maintenance. No men. No guns. Just light houses. |
Oringinal post: http://mbarrick.livejournal.com/919694.html